Making in 3rd Grade – Turning Boxes into Boxes
“Aren’t we just cutting up boxes so students can build them back into boxes?”
I was working with a 3rd grade teacher on a lesson for the NGSS performance expectation:
3-ESS3-1. Make a claim about the merit of a design solution that reduces the impacts of a weather-related hazard.
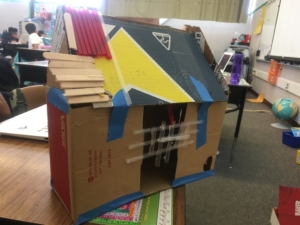
Students were building models of weather-resistant houses from pieces of cardboard. I was busy cutting up a pile of cardboard boxes along the seams when the teacher asked me this question. I paused. We were doing exactly what she was asking about. Should we be giving students boxes, instead? Then, they’d have a base structure to build upon. My instincts told me, “No.” Cutting up the boxes was the right thing to do. I wanted students to learn how structures

can be put together. How walls connected to floors and how roofs connect to walls. I wanted them to investigate how roofs can be designed to repel water.
I thought about the building toys students play with. You don’t get a LEGO set with the floor and walls of the building already put together. You get hundreds, or even thousands, of tiny blocks to snap together. Wooden blocks for toddlers are similar. Triangular and rectangular prisms, cubes, and cylinders allow children to build designs from their imaginations. Cutting up the cardboard boxes felt like breaking down materials into their basic elements.
Cardboard Cats
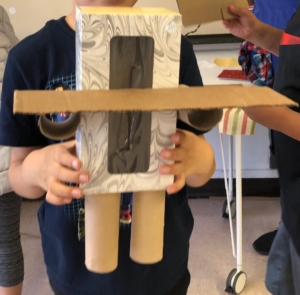
My ideas about cardboard boxes began evolving this year when we reopened our maker space. By the time students started pouring into the space during recess and lunch, we had a surfeit of cardboard boxes accumulated through months of donations. Our new maker teacher was also new to making and much of the activity in those first few weeks with involved free-choice making using masking tape, glue gun stations and lots of boxes. Students immediately started gluing toilet paper tubes onto boxes and designing animals, mostly abstract models of cats. There were “cats” standing on all fours, “cats” standing erect on two legs with arms spread out, and “cats” seated with arms and legs forward. When dozens of these cats started piling up in the storage room next to the space, I decided that we needed to change our cardboard system.

I had attended a workshop on curious contraptions at the Exploratorium’s Tinkering Studio earlier in the year. I failed at building a successful contraption, but while I was there, I noticed bins full of cut up cardboard, sorted by size. No boxes. No cats. Eureka! I went back to our maker space and cut up our cardboard boxes. I piled the pieces into different categories – size, shape, and thickness – and organized the piles into bins. The abstract cat phenomenon ended. Projects started to move in new directions and to take on unique characteristics.
What’s the Objective?
Back in the 3rd grade classroom, working on our weather-resistant structures, I was still pondering the question about cutting up boxes to make new boxes when I looked over at a girl building a house. She had two rectangular pieces of cardboard held at a right angle, and she was trying to twist a pipe cleaner around the corners to hold the cardboard together. She was struggling in that focused way you often find students exhibiting on engineering projects. I turned to the teacher.
“Look,” I said. “That’s why we cut up the boxes.” I pointed to the girl. “She’s solving a problem to complete her own design. That’s the objective.”
It doesn’t matter if students succeed at solving engineering design challenges that teachers pose. What matters is the process. Are students expressing creative solutions to problems? Are they grappling with how to bring their creative ideas to life? Sometimes, learning outcomes can be enhanced through the materials educators provide.
