
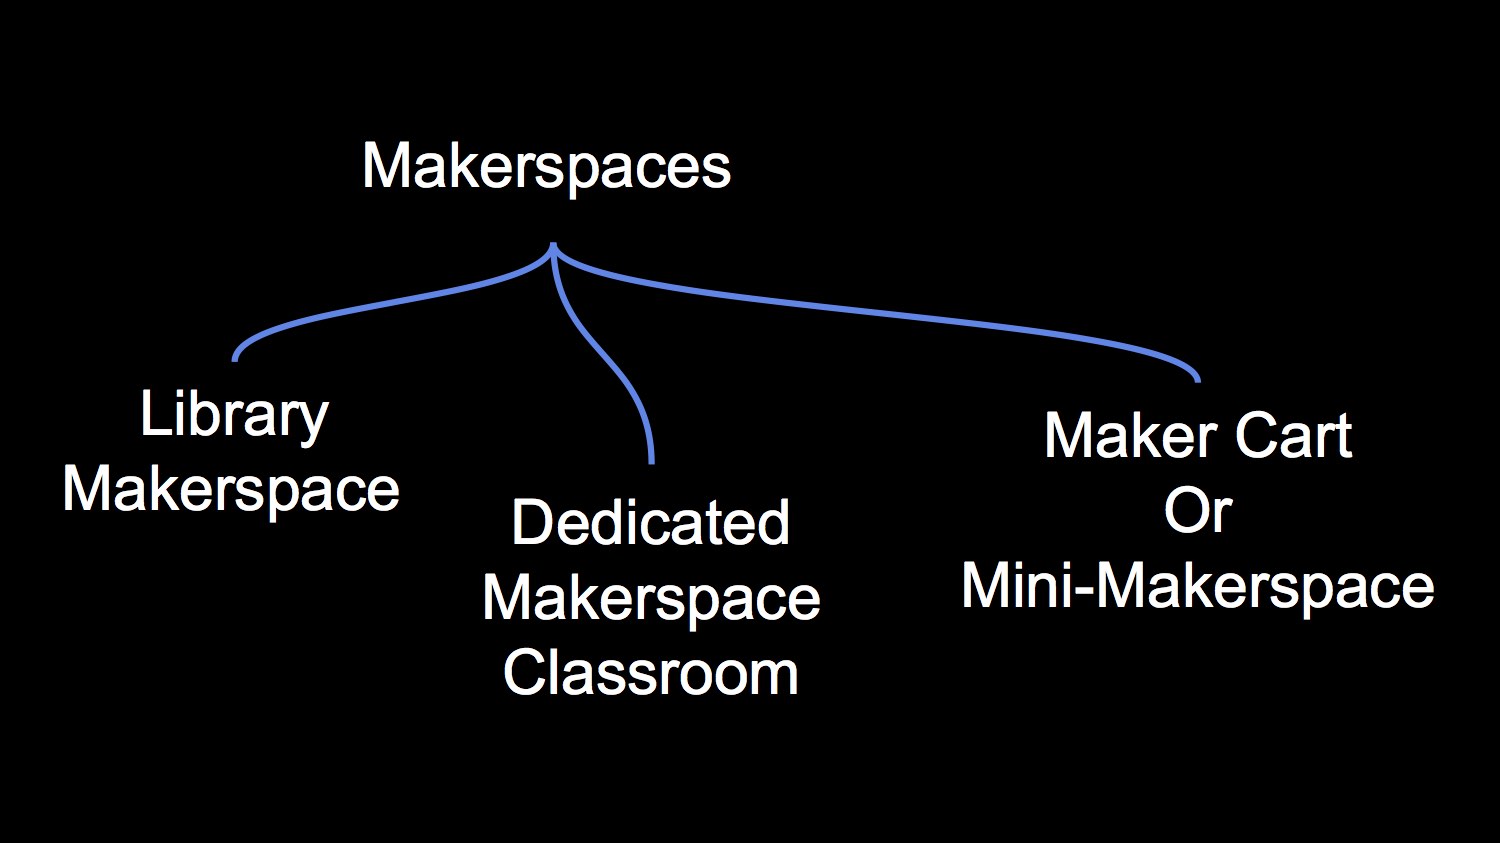
Creating a makerspace program requires consideration of the physical space where making activities happen. In my work with school districts, I’ve seen three main types of makerspaces – the library makersapce, the dedicated makerspace classroom, and the mini-makerspace, which sometimes involves a mobile cart. The design of the makerspace is important for supporting the purpose of your school’s maker-centered learning program. Questions to consider:
- Who are the primary users of the makerspace?
- Is the makerspace used primarily for formal or informal learning? (i.e., content-aligned activities, or recess / afterschool activities).
- Who is in charge of managing, stocking and organizing materials for making activities?
Library Makerspaces
The library makerspace model has major benefits and as well as complicated barriers. In one way, as library spaces are redefined to accommodate innovative technology and updated devices, adding a makerspace to a library redesign makes sense. However, complications can arise. In public schools, librarians are often under union contracts that define their duties. Transforming a traditional library into a combination library/makerspace may require renegotiating librarian contracts to add new responsibilities. In addition, there are costs to remodeling libraries to accommodate the flexible environments needed for maker-centered learning activities.
Dedicated Makerspaces
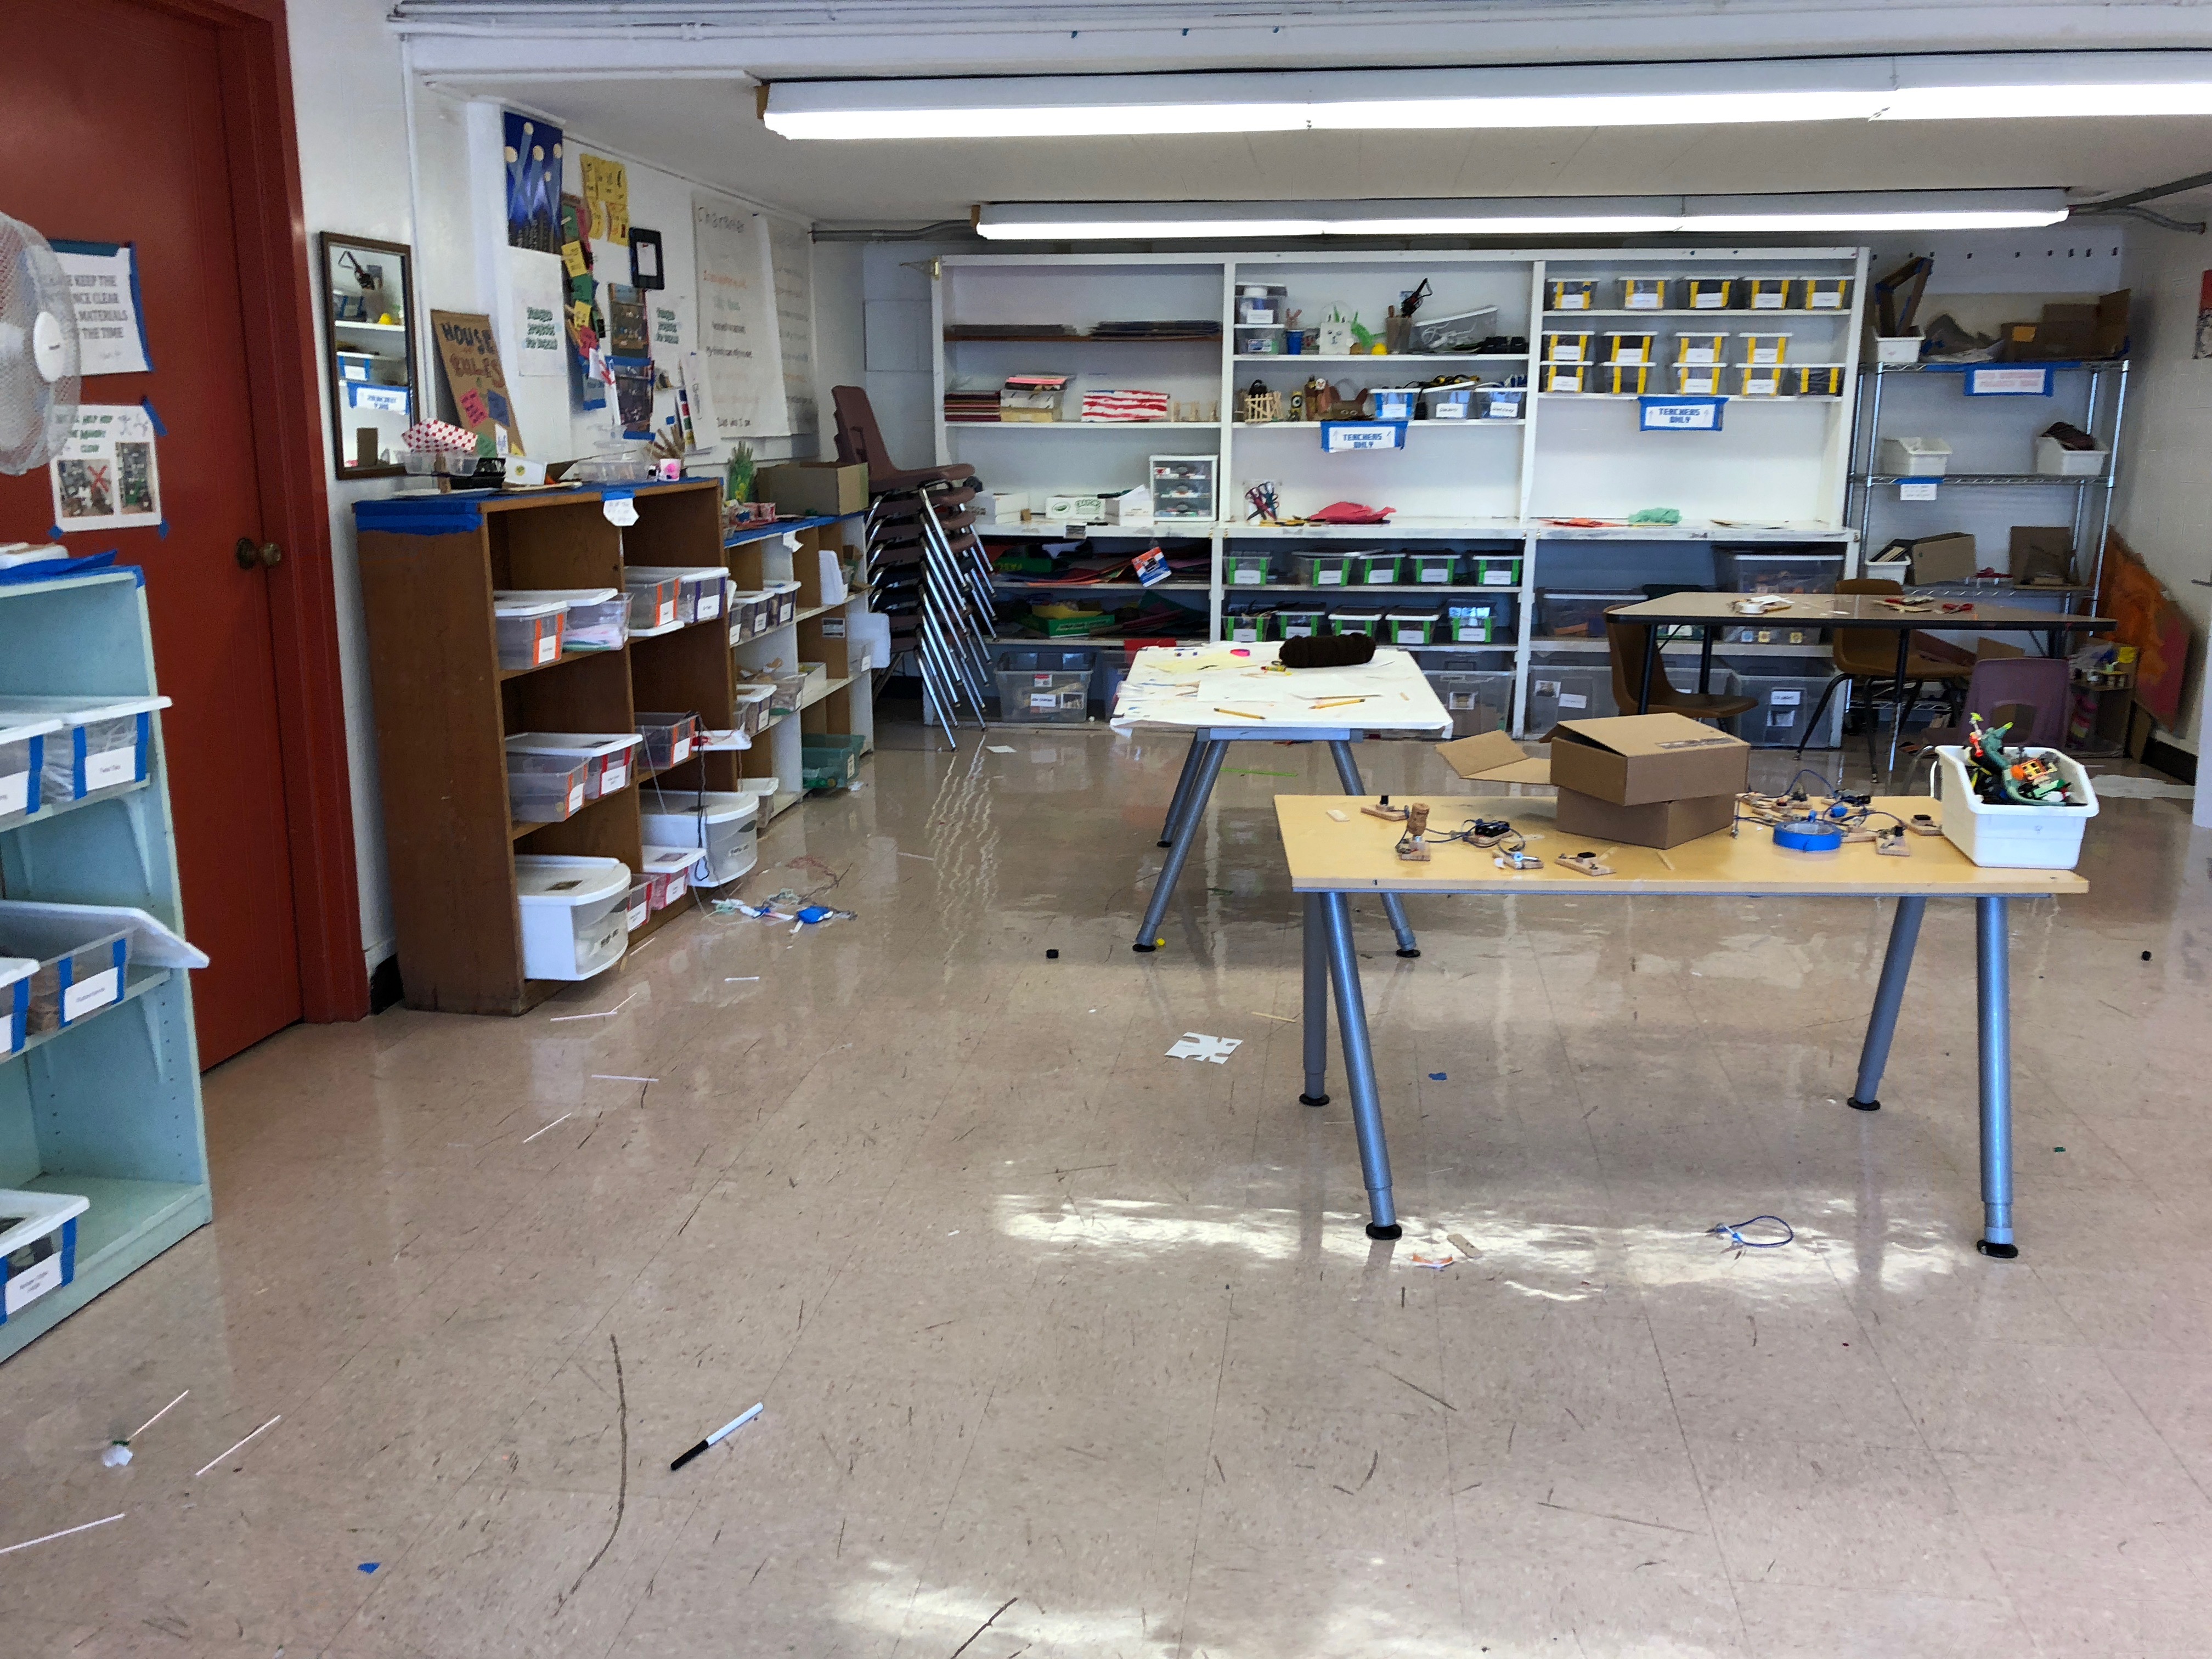
The dedicated makerspace classroom has been the most popular choice in the schools I’ve worked with, and I believe it is the most efficient. Dedicated makerspaces allow schools to keep a surplus of materials for a variety of maker-centered activities. They also provide schools with a classroom where teachers and students can create a mess, free from the constraints of their classrooms. Of course, a dedicated makespace works best when it is managed by a dedicated maker educator.
Mini-Makerspaces
A variation on the makerspace classroom is the mini-makerspace, or even the maker cart. These types of spaces allow teachers flexibility for creating maker-centered activities by having materials stored directly in the classroom. However, these types of spaces are limited in the amount of materials that teachers can store. A mini-makerspace is usually more effective when a school also has a dedicated makerspace where surplus materials are stored. Teachers can collect what they need for specific projects and return items they aren’t using to keep classrooms free of clutter.
Storing Makerspace Supplies
Dedicated Makerspaces
There are two things to keep in mind when storing makerspace supplies – access and organization. In K-5 schools, I design accessibility with the youngest students in mind. It’s important to keep the most common materials that younger students use within reach and close to eye-level. Students won’t use what they can’t see. I also keep materials like batteries, LEDs and wires on top shelves, away from the reach of younger students. If I create a lesson for them that requires these materials, I’ll bring the containers down to a table for easy access.
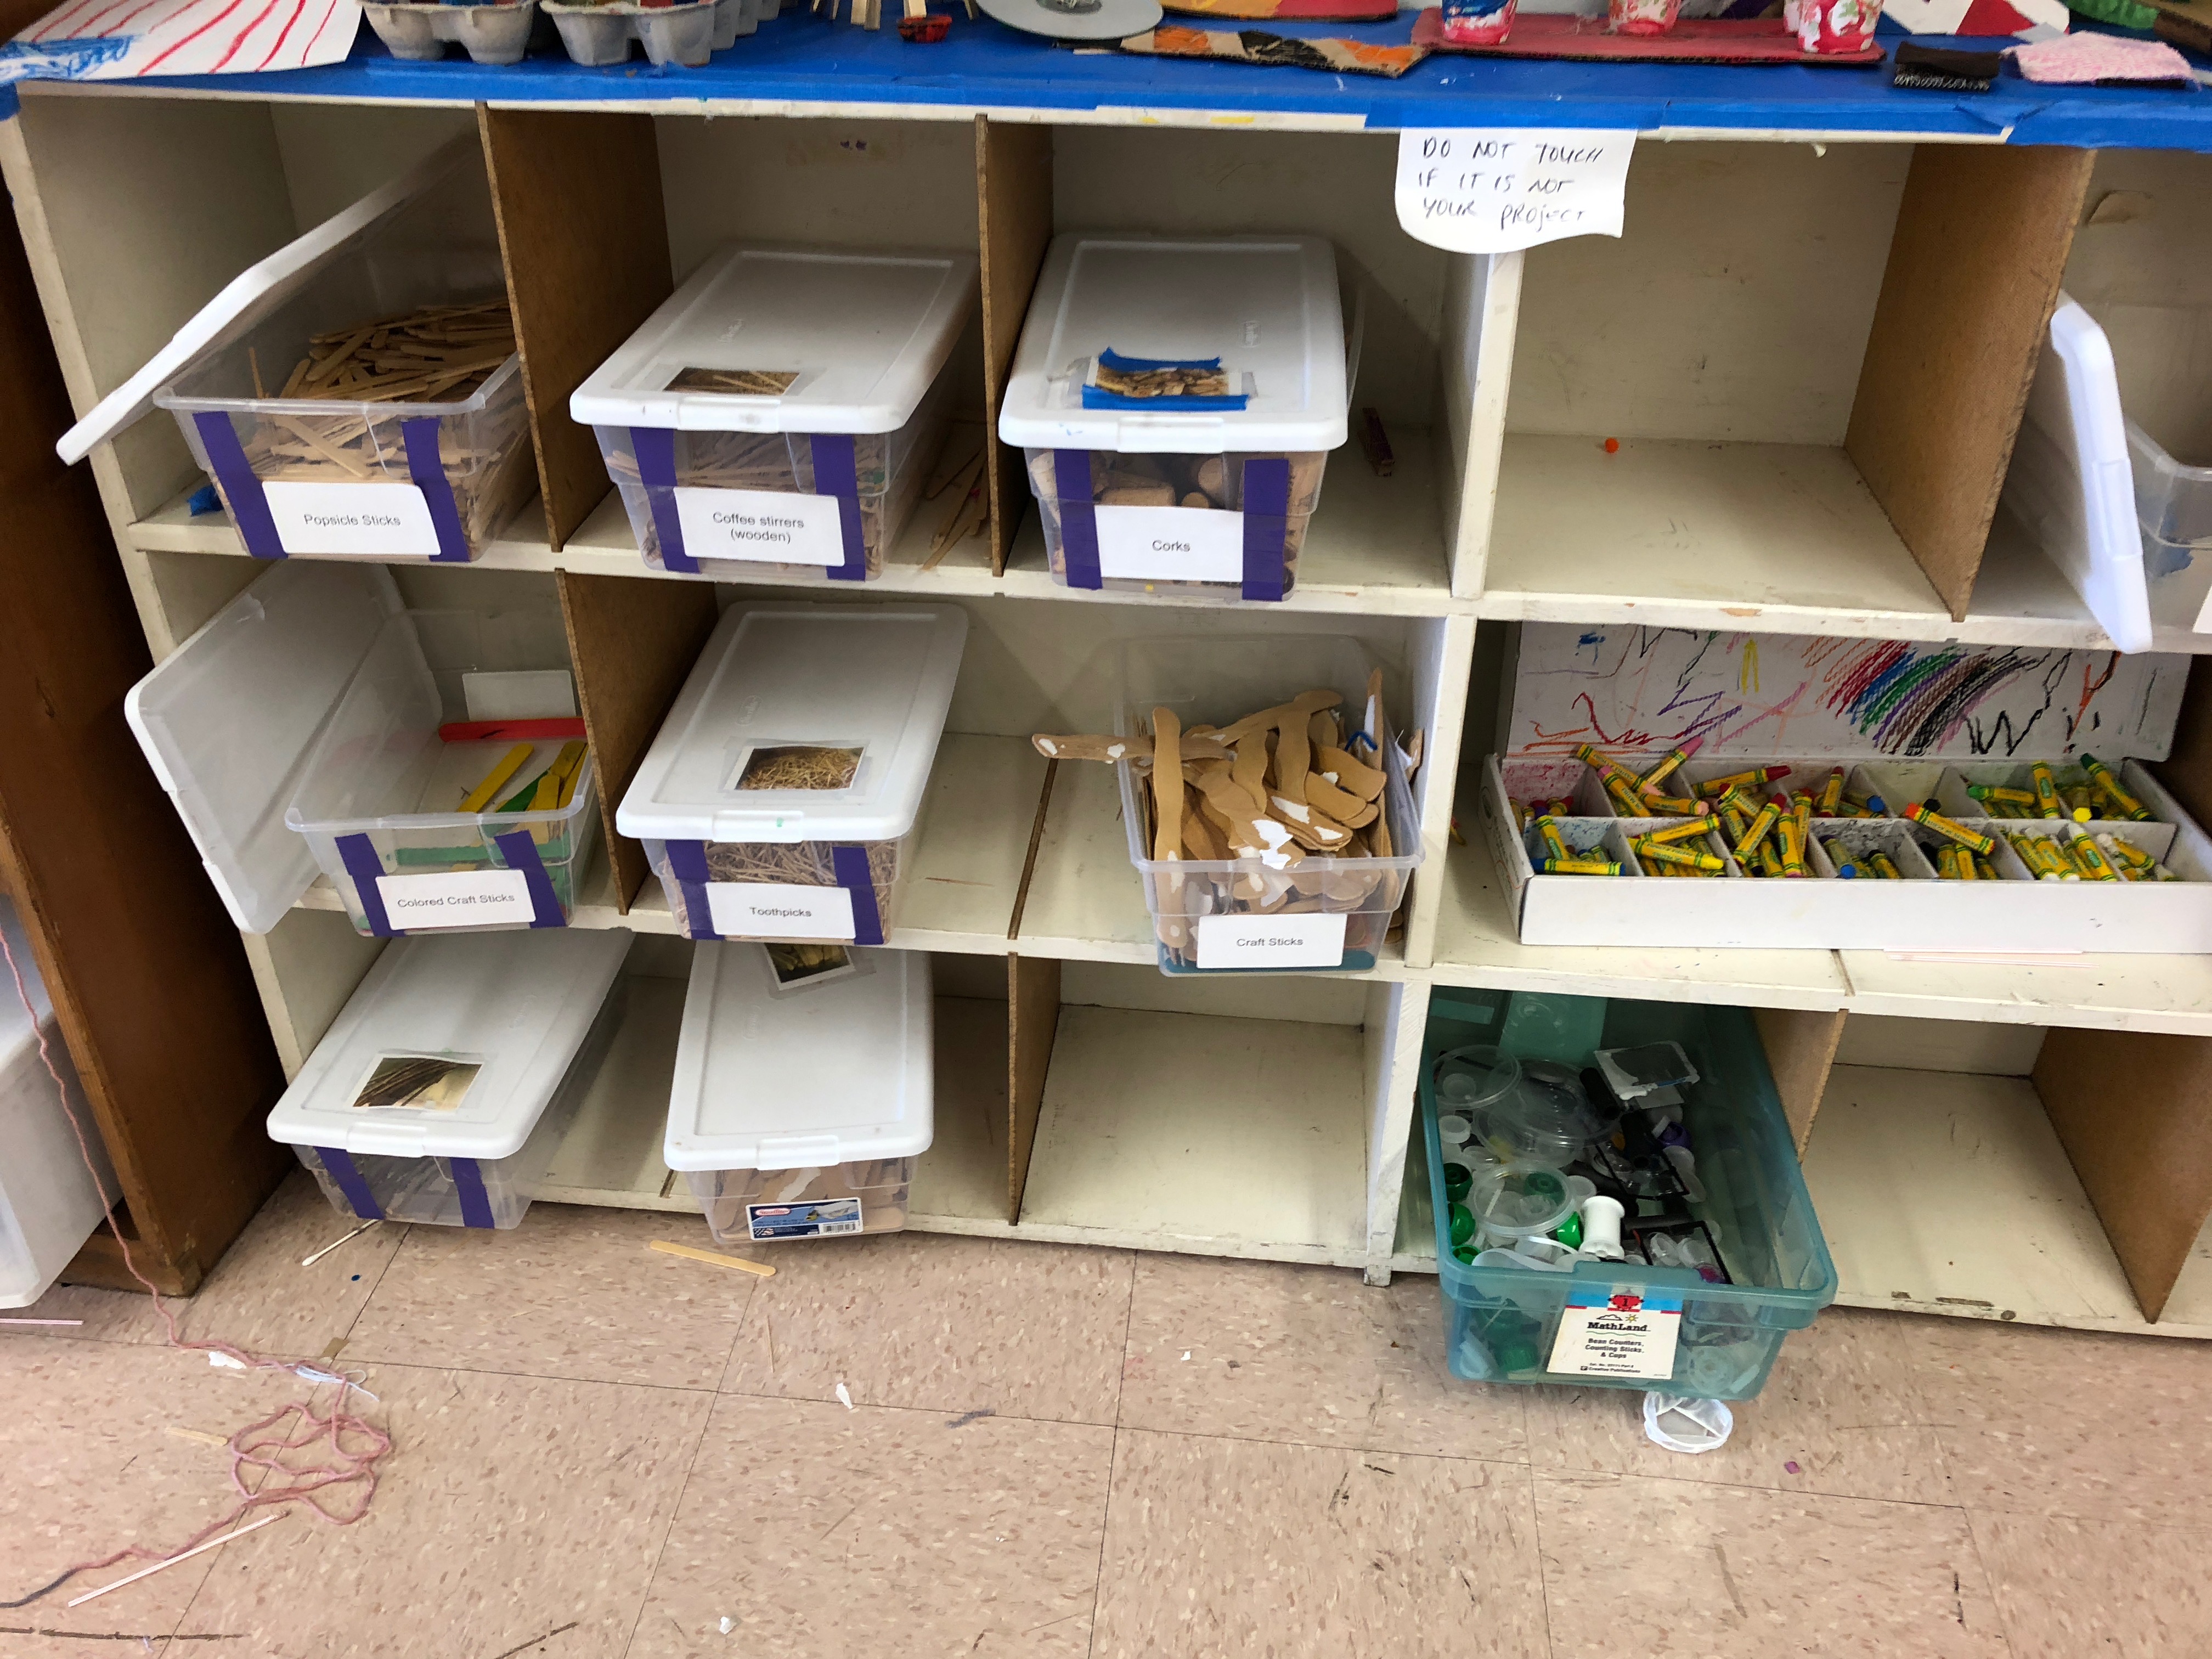
The containers in the makerspace should also be user-friendly. I like 6-quart, inexpensive (about $1) containers with easy-to-open lids. (Larger containers 56-quart containers for overstock supplies are kept in a back room.) The system I advocate for was modeled on the Creativity Lab at Lighthouse Charter School in Oakland, CA. They have a small and efficient space, packed with resources. One feature that I especially like is their color-coded bins. Stripes of colored duct tape run vertically up the front of the bin and frame a label made from a trimmed 3×5 index card. The color of the duct tape corresponds to how the material is used. For instance, in the photo on the left, purple duct tape means wooden materials (craft sticks, toothpicks, dowels, etc.). Since I work in K-5 schools with large populations of English Language Learners, I put pictures of the materials directly on the bins. That way, a student can match the picture to the item and the words.
Here’s an example of the color-coded bin labels adapted from the Creativity Lab:
- Yellow = electronics (wires, LEDs, batteries, motors, etc.)
- Blue/Turqoise = holding things together (tape, glue, clips, etc.)
- Red/Pink = plastics (straws, baggies, random plastic bits, etc.)
- Green = sewing (needles, thread, buttons, etc.)
- Orange = decorative (pom poms, googly eyes, beads, etc.)
- Purple = wood
- Light Green = random materials
- Gold = tools (pencils, scissors, crayons, etc.)
Mini-Makerspaces
In schools where a dedicated makerspace is not practical, because an extra classroom is not available or cost-prohibitive, mini-makerspaces can prove a useful option. Some teachers also like the flexibility of having maker materials in their classrooms, so students can work on projects when they have small chunks of free time during the school day. These types of makerspaces come in two options – the classroom mini-makerspace and the mobile cart.
The classroom mini-makerspace can look like a compact version of the dedicated makerspace. Fewer shelves with fewer 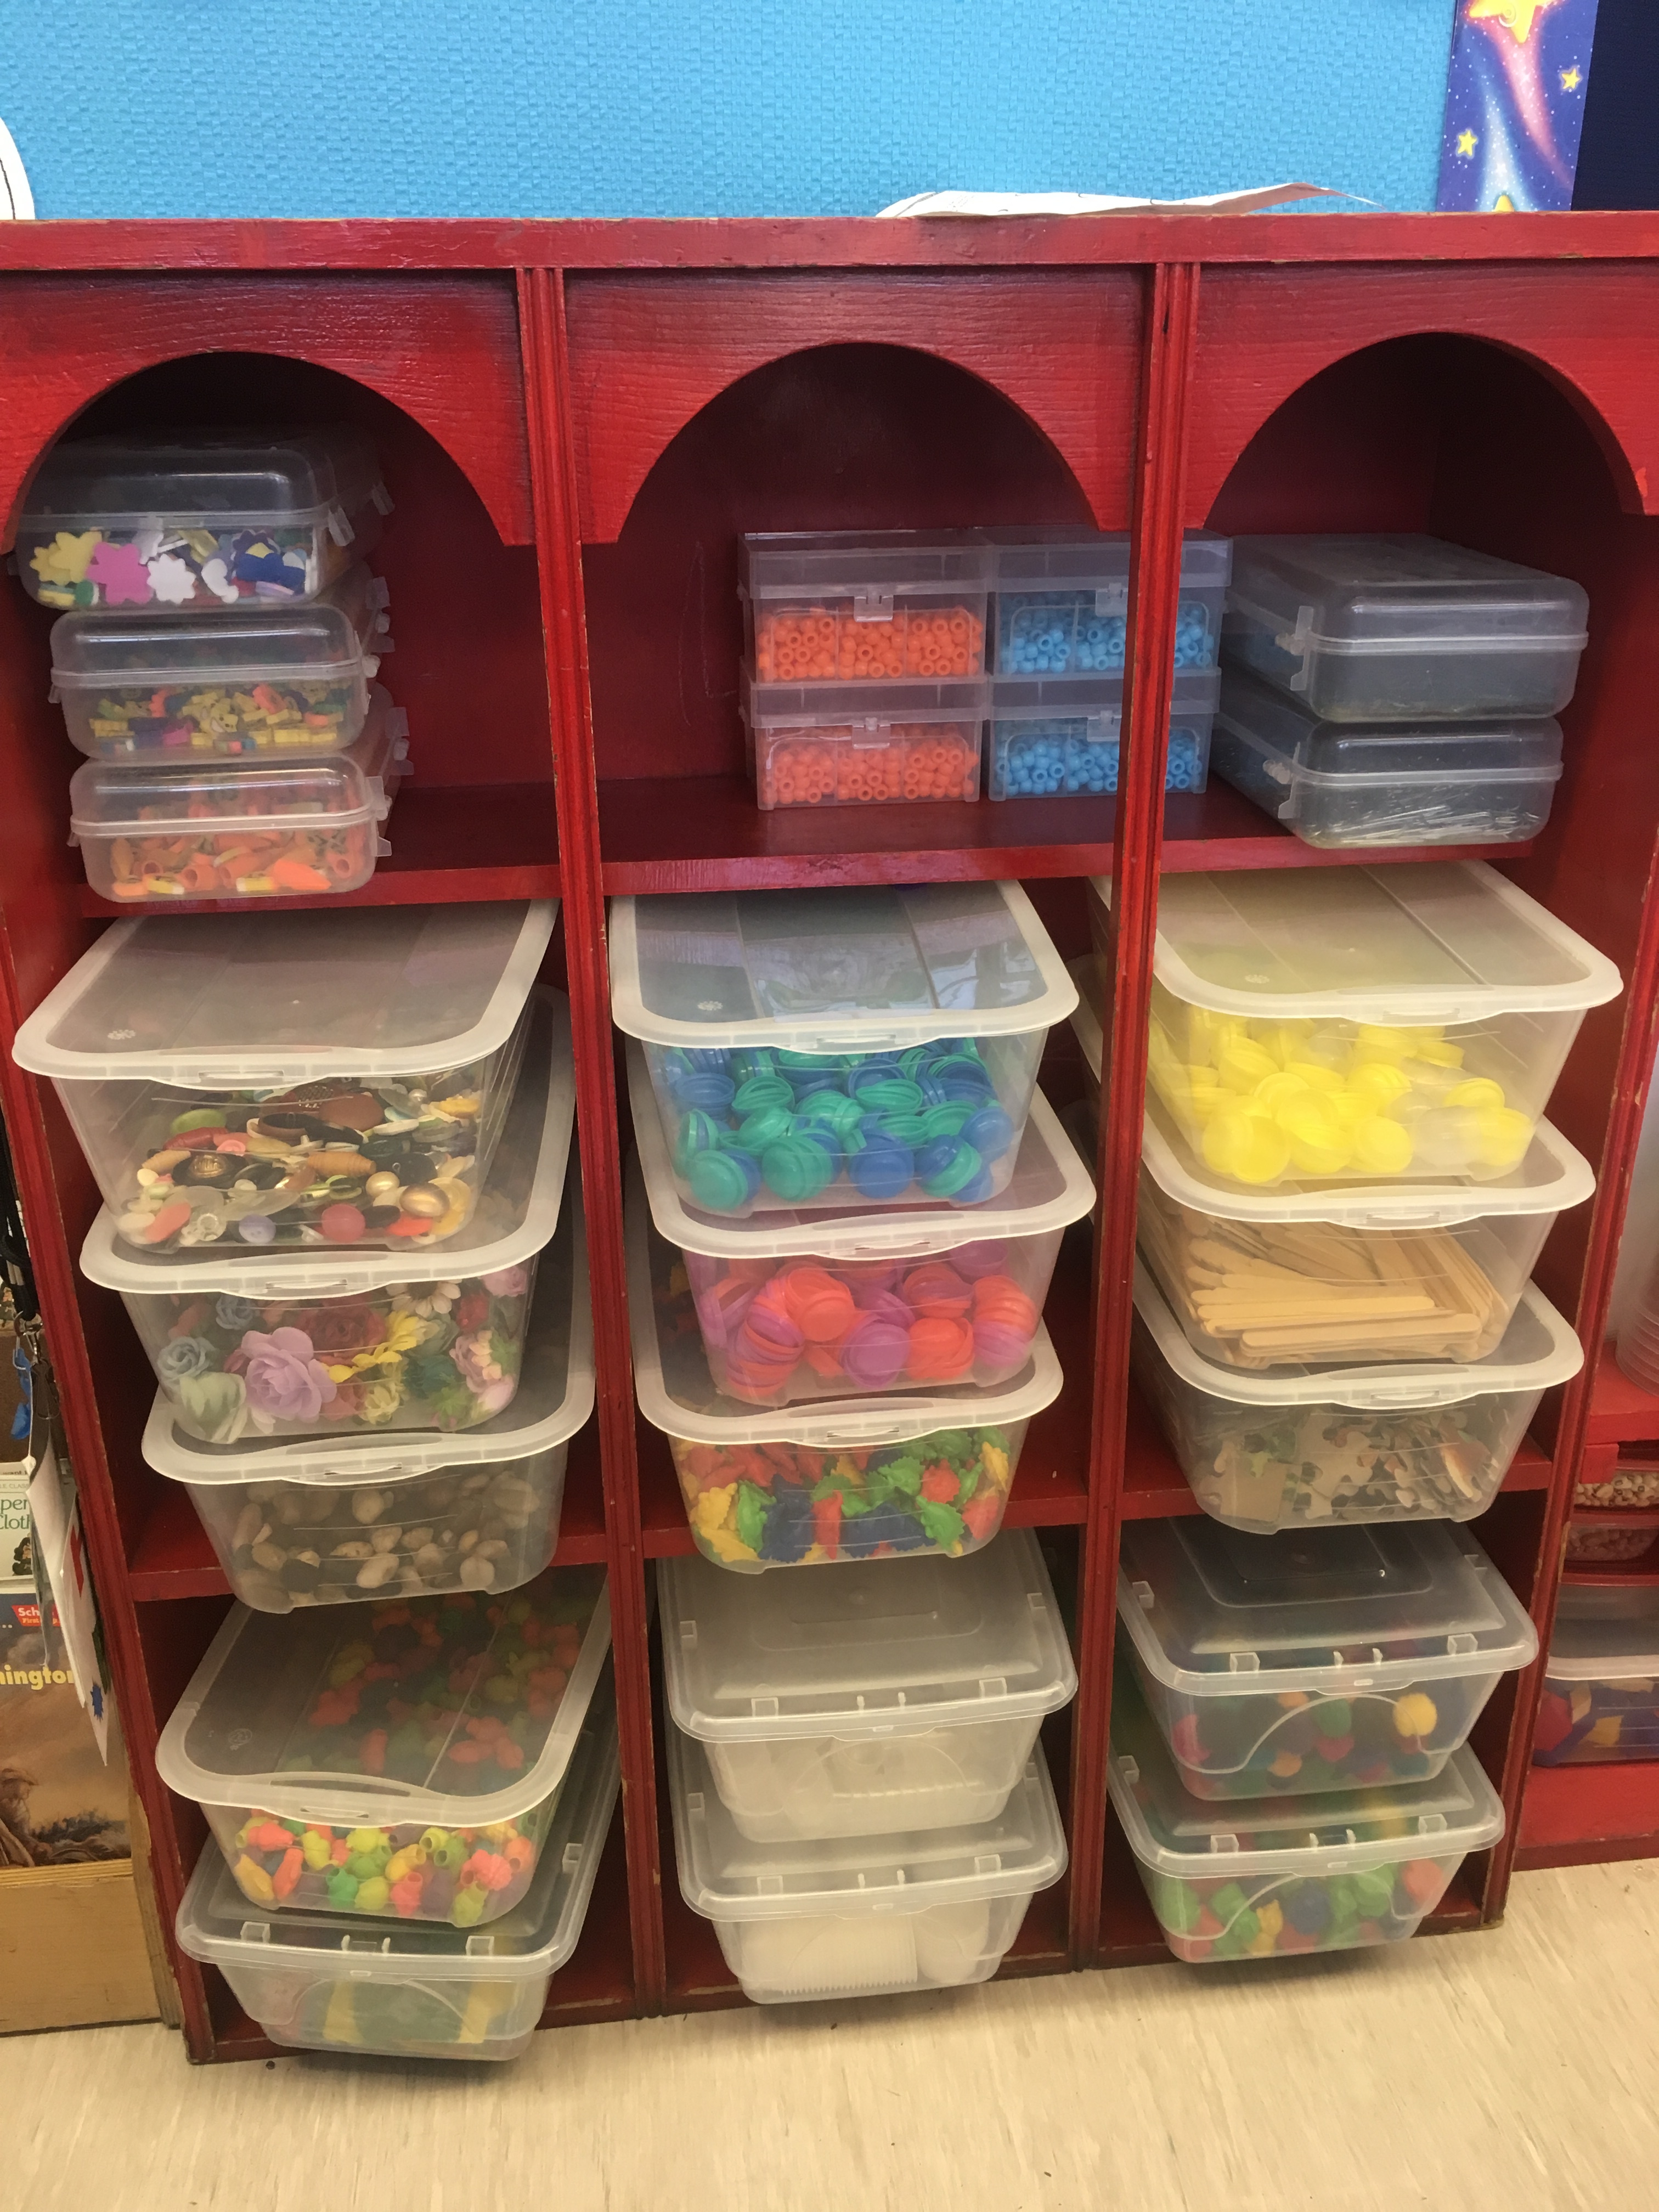 containers might line a wall of the room. A long table in the room can be transformed into a hot glue gun station during maker-centered activities. If at all possible, I recommend that a dedicated makerspace accompany mini-makerspaces so teachers have access to bulk supplies and a wider variety of materials for students to access.
Makerspace Carts
I’ve seen lots of versions of mini-makerspaces as mobile carts. The benefits are obvious. The cart can be pulled out for activities, containers can be taken to desks, and items can be neatly stored in one compact system. The downsides to a cart are the limitations it fosters. In maker-centered learning, students are encouraged to explore two key paths – unique problem solving and authentic creative 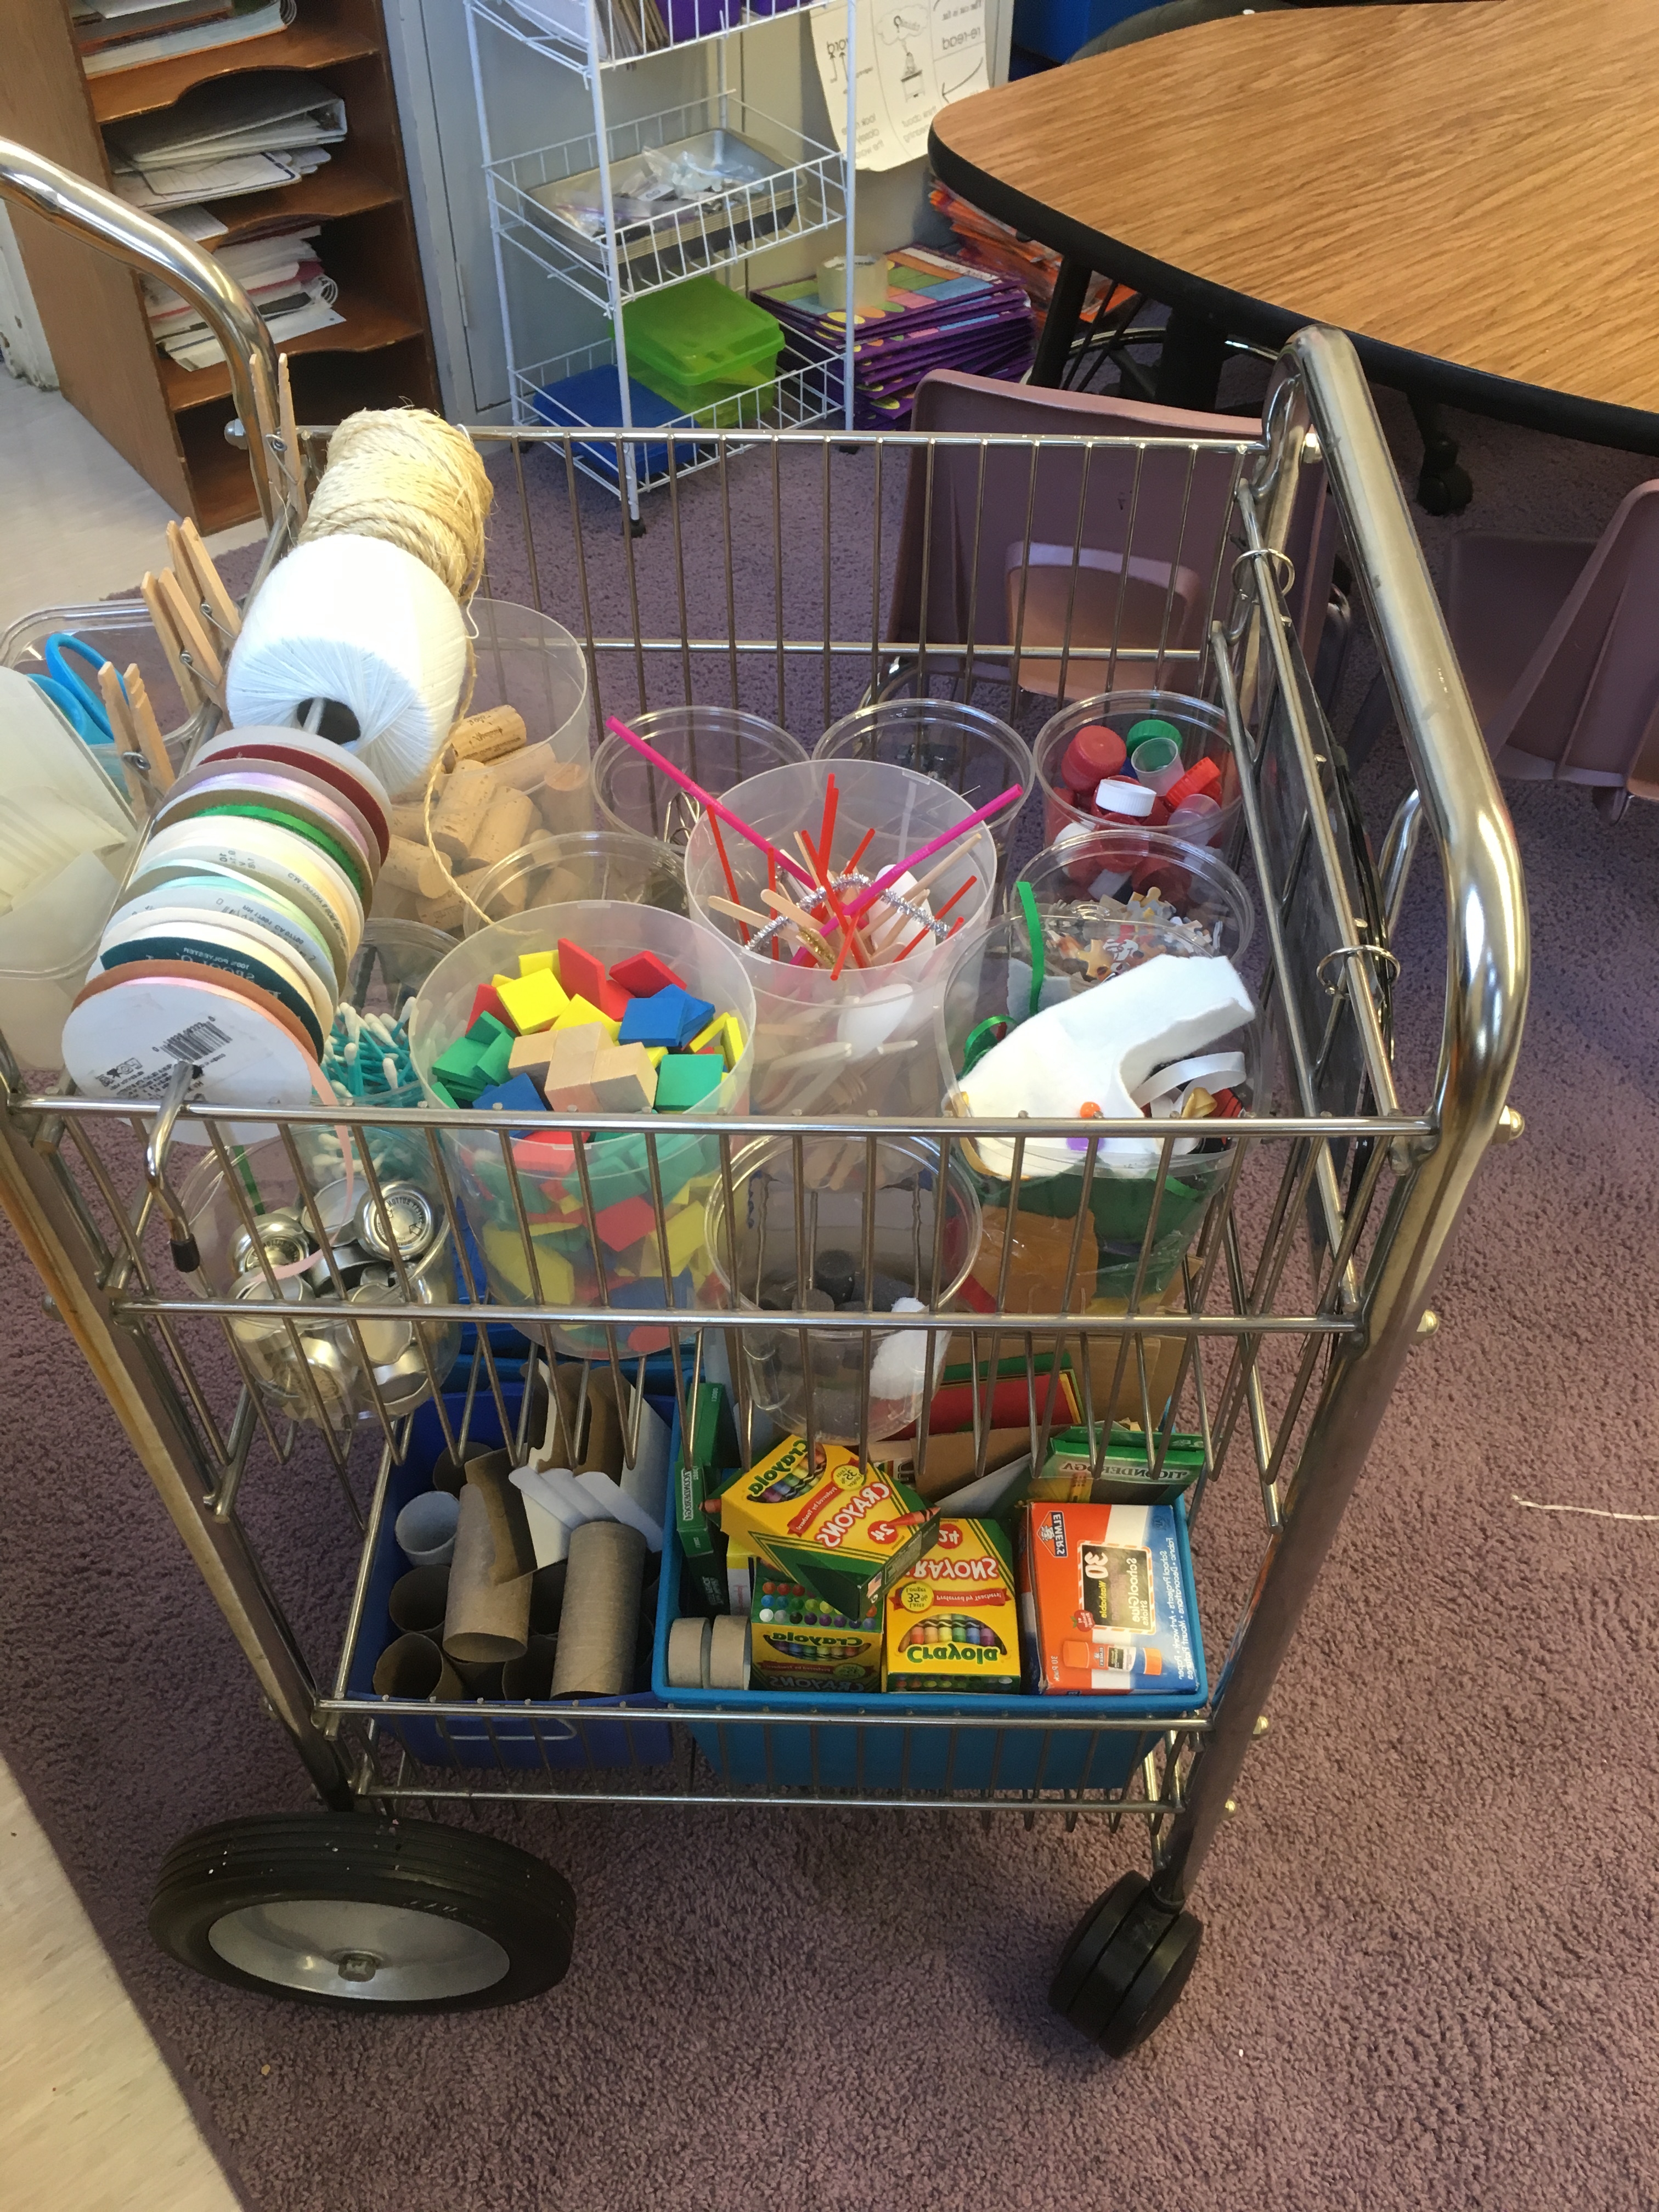 expression. Access to a wide variety of materials (and what might seem like trash, at times) provides students with inspiration for unexpected outcomes. By limiting students’ choices, we limit their ability to show us what they are thinking.
The Shared Cart
Often, when I work with schools in the early stages of makerspace design, teachers express interest a cart that can be shared across classrooms, without taking up space in any single room for a long period of time. It sounds like a great solution to the problem of getting a makerspace running quickly and avoiding the issue of dedicating an entire makerspace classroom. However, not only do teachers run into the same problems encountered by teachers using mini-makerspaces, in terms of limited students’ creativity, but they also run into problems of managing the cart. No matter how confident teachers are that they can maintain the cart across shared classrooms, the cart inevitably becomes no one’s responsibility. Tools are lost, supplies are not re-stocked, and scheduling is difficult. One possible solution is to have the cart managed by a maker-educator, who accompanies the cart to different classrooms and resupplies it after each use. But, schools would have to absorb the cost of additional personnel. For these reasons, I would recommend a dedicated makerspace over a shared cart.